Browser Recording
Recording from Your Browser
Record a consultation directly from the Clinara web app on your laptop or desktop — no kiosk hardware required.
Open the Sessions pageStart a New Recording
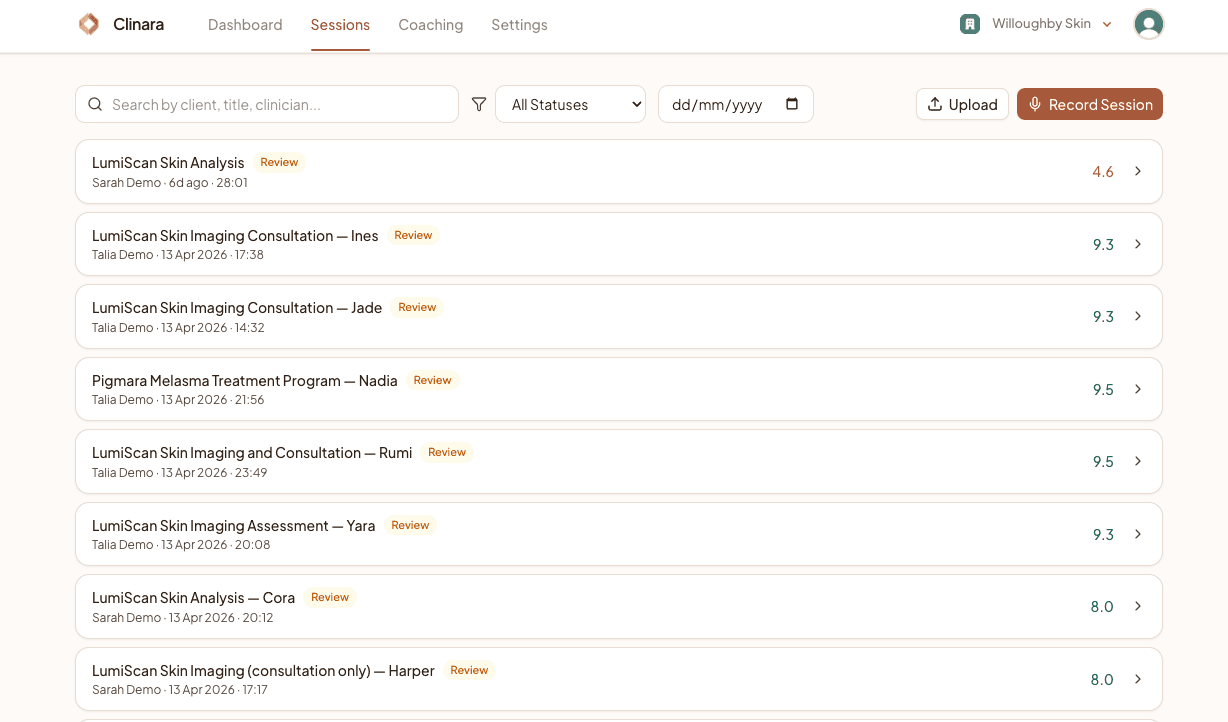
Open the Sessions page
From the top navigation, click “Sessions”. You’ll see the list of every session in your clinic. In the top-right corner there are two buttons: “Upload” (for audio you’ve already recorded elsewhere) and “Record Session” (to record live from your browser). Click “Record Session” to begin.
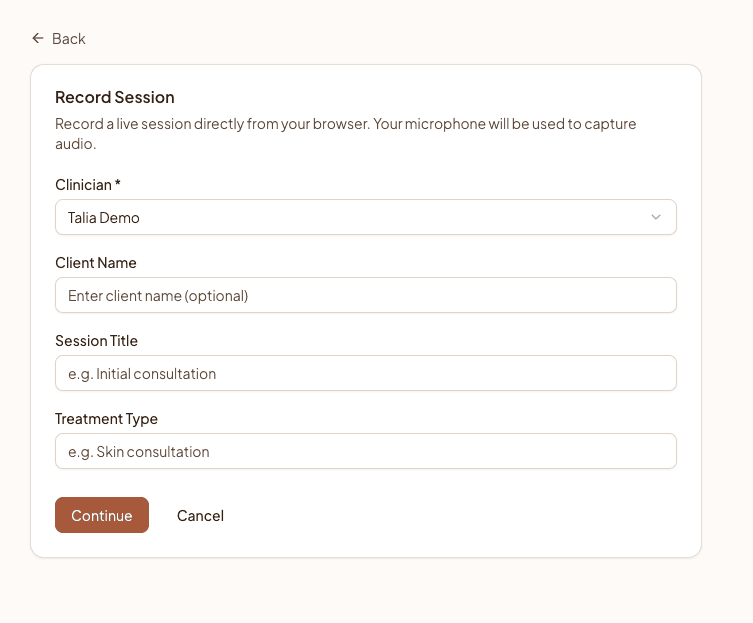
Fill in the session details
Choose the clinician the session is being recorded for — it defaults to you, but admins can record on behalf of any clinician in the clinic. Optionally add the client’s name, a session title (e.g. “Initial consultation”), and the treatment type (e.g. “Skin consultation”). Only the clinician is required; everything else helps you find the session later. Click “Continue” when you’re ready.
Review the privacy notice (if your clinic uses in-app consent)
If your clinic has turned on “Collect client consent in Clinara” in Settings › Clinic, you’ll see a Privacy & Consent step here. Read the notice with the client, tick the acknowledgement on their behalf, then click “Start Recording”. If your clinic captures consent another way, this step is skipped and the form’s primary button reads “Start Recording” directly.
During the Recording
Allow microphone access
The first time you record on a given browser, you’ll get a permission prompt asking to use your microphone. Click “Allow”. If you accidentally block it, you can re-enable Clinara’s mic access from your browser’s site settings (the padlock icon in the address bar).
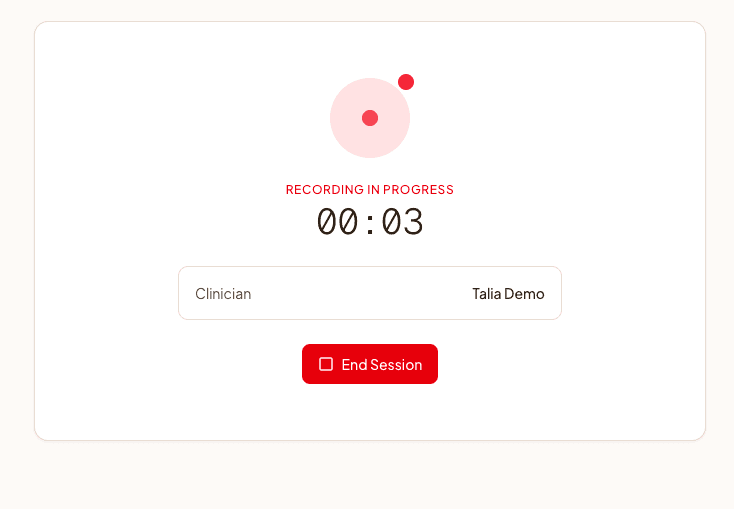
Watch the recording in progress
Once recording starts you’ll see a pulsing red indicator, the live timer, and the session details you entered. The recording is captured locally in the browser and streamed to encrypted storage on Clinara’s servers as it goes. Recordings are capped at 2 hours — a warning appears in the final 5 minutes so you can wrap up cleanly.
End the Session
Stop and upload
When the consultation is finished, click “End Session”. You’ll get an “Are you sure?” confirmation — click “End Now” to finish. Clinara saves the recording locally first (so nothing is lost if your connection drops) and then uploads it. Once it’s done you’ll be taken straight to the new session’s page where transcription and the AI-drafted note are kicked off automatically.
Tips for browser recording
A few small things make a big difference when recording from your laptop:
- 1Keep the tab open — Stay on the recording tab until the upload finishes. If you close the tab or navigate away mid-session, Clinara will save what it captured and queue it to upload next time you open the app — but the safest path is to let it finish on screen.
- 2Use a quality microphone — Built-in laptop mics work, but a USB or headset microphone gives noticeably cleaner transcripts. Position the mic close enough to pick up both voices.
- 3Stay on a stable connection — The audio uploads after you press End Session. Make sure you’re on Wi-Fi or wired Ethernet so the upload finishes promptly. If your network blips during upload, Clinara queues the recording and retries automatically.
- 4Upload audio you recorded elsewhere — Already have a recording from another tool? Use the “Upload” button on the Sessions page to bring it into Clinara for transcription and AI-drafted notes.
Need help? Contact support